







 Language
 Currency


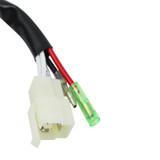
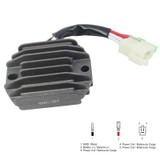
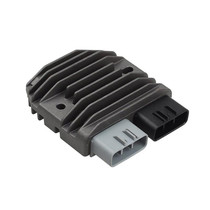
1. Weight: 150G2. Output voltage: 14.5V3. Output current: 25A4. Heat dissipation material: aluminum heat dissipation shell5. Wire length: 20CMApplicab…


glamwize ("we" and "us") is the operator of (https://www.glamwize.com ("Website"). By placing an order through this Website you will be agreeing to the terms below. These are provided to ensure both parties are aware of and agree upon this arrangement to mutually protect and set expectations on our
service.
1. General
Subject to stock availability. We try to maintain accurate stock counts on our website but from time-to-time there may be a stock discrepancy and we will not be able to fulfill all your items at time of purchase.
In this instance, we will fulfill the available products to you, and contact you about whether you would prefer to await restocking of the backordered item or if you would prefer for us to process a refund.
2. Shipping Costs
Shipping costs are calculated during checkout based on weight, dimensions and destination of the items in the order. Payment for shipping will be collected with the purchase. This price will be the final price for shipping cost to the customer.
3. Returns
3.1 Return Due To Change Of Mind
glamwize will happily accept returns due to change of mind as long as a request to return is received by us within 30 days of receipt of item and are returned to us in original packaging, unused and in resellable condition.
Return shipping will be paid at the customers expense and will be required to arrange their own shipping.
Once returns are received and accepted, refunds will be processed to store credit for a future purchase. We will notify you once this has been completed through email. (glamwize) will refund the value of the goods returned but will NOT refund the value of any shipping paid.
3.2 Warranty Returns
glamwize will happily honor any valid warranty claims, provided a claim is submitted within 90 days of receipt of items.
Customers will be required to pre-pay the return shipping, however we will reimburse you upon successful warranty claim.
Upon return receipt of items for warranty claim, you can expect glamwize to process your warranty claim within 7 days.
Once warranty claim is confirmed, you will receive the choice of:
(a) refund to your payment method
(b) a refund in store credit
(c) a replacement item sent to you (if stock is available).
4. Delivery Terms
4.1 Transit Time Domestically
In general, domestic shipments are in transit for 2 - 7 days.
4.2 Transit time Internationally
Generally, orders shipped internationally are in transit for 7 - 30 days. This varies greatly depending on the courier you have selected. We are able to offer a more specific estimate when you are choosing your courier at checkout.
4.3 Dispatch Time
Orders are usually dispatched within 2 - 4 business days of payment of order.
Our warehouse operates on Monday - Friday during standard business hours, except on national holidays at which time the warehouse will be closed. In these instances, we take steps to ensure shipment delays will be kept to a minimum.
4.4 Change Of Delivery Address
For change of delivery address requests, we are able to change the address at any time before the order has been dispatched.
4.5 P.O. Box Shipping
glamwize will ship to P.O. box addresses using postal services only. We are unable to offer couriers services to these locations.
4.6 Military Address Shipping
We are able to ship to military addresses using USPS. We are unable to offer this service using courier services.
4.7 Items Out Of Stock
If an item is out of stock, we will dispatch the in-stock items immediately and send the remaining items once they return to stock.
4.8 Delivery Time Exceeded
If delivery time has exceeded the forecasted time, please contact us so that we can conduct an investigation.
5. Tracking Notifications
Upon dispatch, customers will receive a tracking link from which they will be able to follow the progress of their shipment based on the latest updates made available by the shipping provider.
6. Parcels Damaged In Transit
If you find a parcel is damaged in-transit, if possible, please reject the parcel from the courier and get in touch with our customer service. If the parcel has been delivered without you being present, please contact customer service with next steps.
7. Duties & Taxes
7.1 Sales Tax
Sales tax has already been applied to the price of the goods as displayed on the website.
7.2 Import Duties & Taxes
Import duties and taxes for international shipments may be liable to be paid upon arrival in destination country. This varies by country, and glamwize encourage you to be aware of these potential costs before placing an order with us.
If you refuse to to pay duties and taxes upon arrival at your destination country, the goods will be returned to glamwize at the customers expense, and the customer will receive a refund for the value of goods paid, minus the cost of the return shipping. The cost of the initial shipping will not be refunded.
8. Cancellations
If you change your mind before you have received your order, we are able to accept cancellations at any time before the order has been dispatched. If an order has already been dispatched, please refer to our refund policy.
9. Insurance
Parcels are insured for loss and damage up to the value as stated by the courier.
9.1 Process for parcel damaged in-transit
We will process a refund or replacement as soon as the courier has completed their investigation into the claim.
9.2 Process for parcel lost in-transit
We will process a refund or replacement as soon as the courier has conducted an investigation and deemed the parcel lost.
10. Customer service
For all customer service enquiries, please submit an enquiry at admin@glamwize.com.
This product hasn't received any reviews yet. Be the first to review this product!







Get the latest updates on our biggest discounts and news

Fast express shipping guarantees your items will arrive quickly and reliably. Experience fast & worry-free shipping

Hassle free return for your next purchase and if you're not satisfied, just send it back - no questions asked

Get the help you need quickly, with detailed responsive service from experts. Enjoy a streamlined help support

Secure online transactions, providing you with peace of mind, and the assurance that your payments are always safe
 <>
<>


